All contacts
Find any person from your store, filter the list, export it and read the detailed profile of each contact.
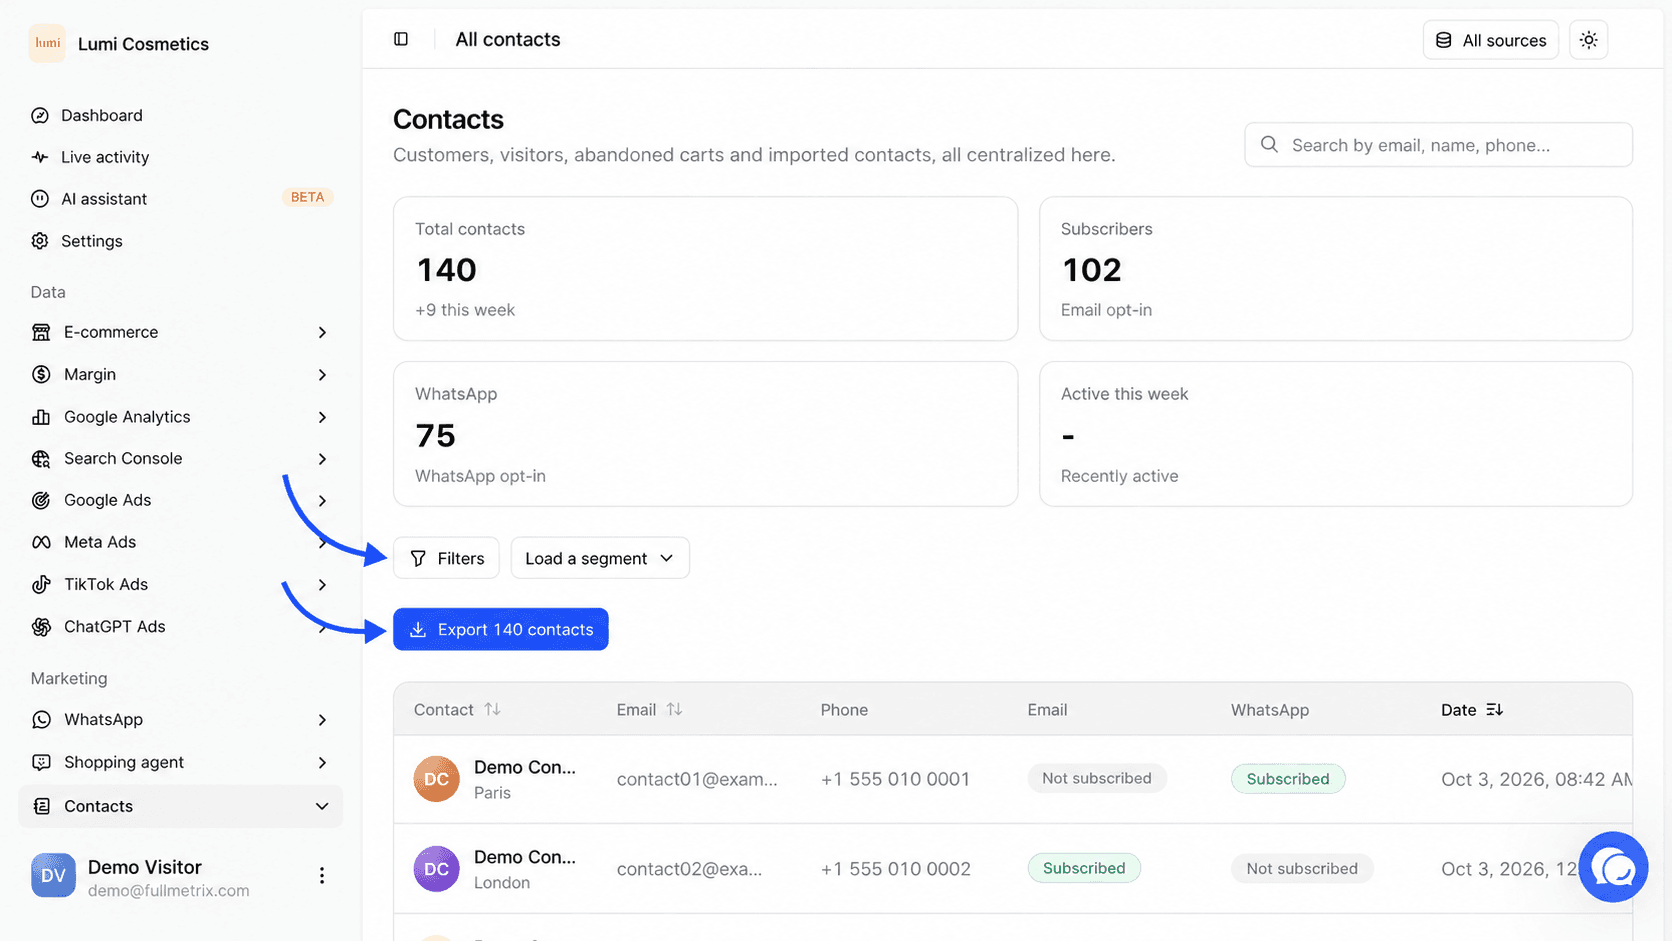
The All contacts page gathers every person we can identify by an email or a phone number. It includes your customers synced from the store, visitors who left their email, people who signed up through a form and contacts you imported. Each row opens a profile that tells what the person did with you.
To open it, click Contacts in the Marketing group of the sidebar, then All contacts.
A store must be connected
Without a connected store, the page shows Connect E-commerce and a Set up button that leads to integrations. During the first store import, it shows Preparing your workspace and refreshes on its own. To connect a store, read Platforms.
The numbers at the top of the page
Four cards summarize the list. They follow the filters and the selected store, so you can count, for example, the email subscribers of a single segment.
| Card | What it counts |
|---|---|
| Total contacts | The number of contacts in the list. The line below shows how many were created in the last 7 days, for example "+42 this week". |
| Subscribers | Contacts subscribed to marketing emails, labeled Email opt-in. |
| Contacts subscribed to marketing WhatsApp messages, labeled WhatsApp opt-in. | |
| Active this week | This card currently shows a dash. |
Search for a person
The Search by email, name, phone... field sits at the top right. Type a few letters of an email, a name, a number or a company name. The list updates as soon as you stop typing, and the closest matches come first.
Search ignores accents and capital letters, so "helene" finds "Hélène".
If nothing matches, the table shows No results for this search.
Filter the list and load a segment
Below the cards, the filter bar narrows the list down to a specific group.
- Filters opens the bar. Then click Add a filter, pick a field (country, tag, WhatsApp subscription, number of orders, purchased product...), set the condition and click Apply.
- Load a segment applies a saved segment in one click. The list offers Suggested segments from Fullmetrix and your Personal segments. The Create a segment button at the bottom of the list opens the editor.
- Clear filters brings back the full list.
Until you click Apply, a message tells you that some changes are not applied yet.
When no contact matches, the table shows No contacts match these criteria with the hint Adjust the filters or the selected source.
The available fields, the difference between attributes and actions and how to save a filter as a segment are explained in detail in Segments.
Choose the store
If you have several stores, the All sources selector at the top of the page limits the list to the contacts of one or more stores. How this selector works is described in Store selector.
Imported contacts belong to no store
A contact added by hand, by file or by pasting is not attached to any store. It shows when All sources is selected and disappears as soon as you pick a specific store.
Read the table
The table shows one row per contact.
| Column | Content |
|---|---|
| Contact | The initial or avatar, the person's name and, below it, their company or city. A person with no known name shows as Anonymous. |
| The email address, or a dash if there is none. | |
| Phone | The phone number, or the WhatsApp number if there is no phone, in international format. |
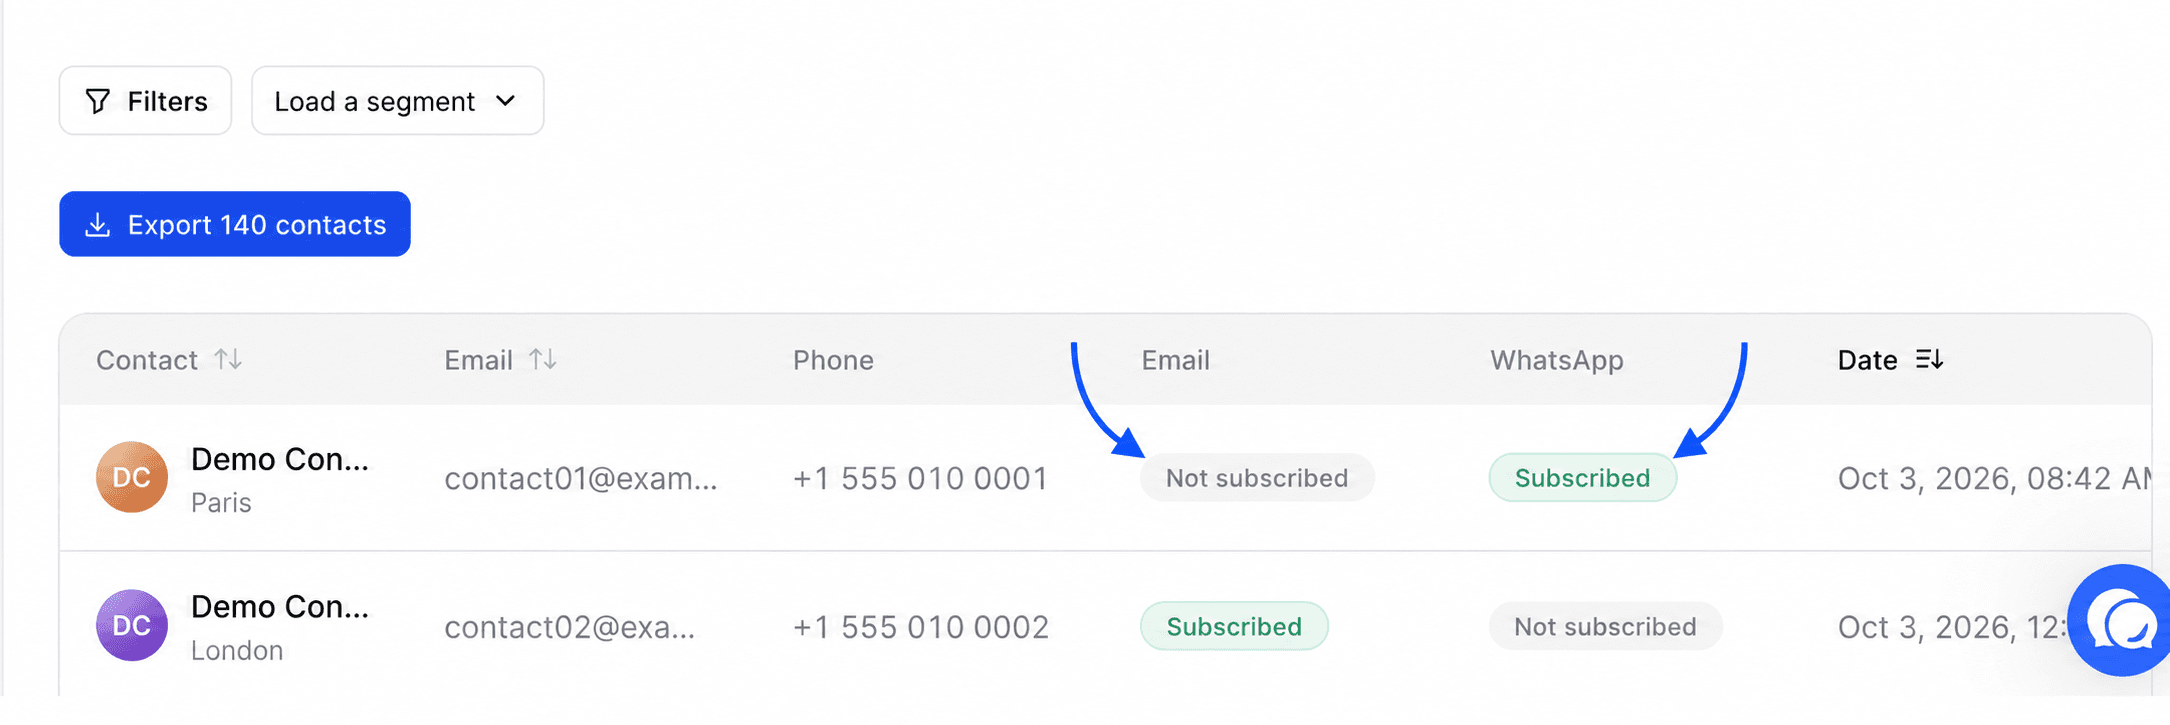
| Email (badge) | Subscribed in green if the person accepts marketing emails, Not subscribed in grey otherwise. |
| Subscribed in green if the person accepts marketing WhatsApp messages, Not subscribed in grey otherwise. | |
| Date | The date and time the contact was created, in your organization's time zone. |
By default, the newest contacts are at the top. Click the Contact, Email or Date header to sort by that column. A second click reverses the order.
At the bottom of the table, the pagination shows the displayed range and lets you change page or the number of rows per page. The list starts with 100 contacts per page.
Export the list
The Export button shows how many contacts are included, for example Export 1,250 contacts. The export keeps the current search, sort, store and filters. A window then lets you choose the columns, then download the file or send it. Everything about exports, including recurring exports, is in Exports.
When the list is empty
If your organization has no contacts yet, the page shows No contacts found and the Add contacts button. This button opens the three ways to add people, described in Import.
Contacts also arrive on their own. A customer who orders on the store, a visitor who types their email or a person who fills in a form becomes a contact.
A contact's profile
Click a row in the table to open the person's profile. The Contacts breadcrumb at the top takes you back to the list.
The header
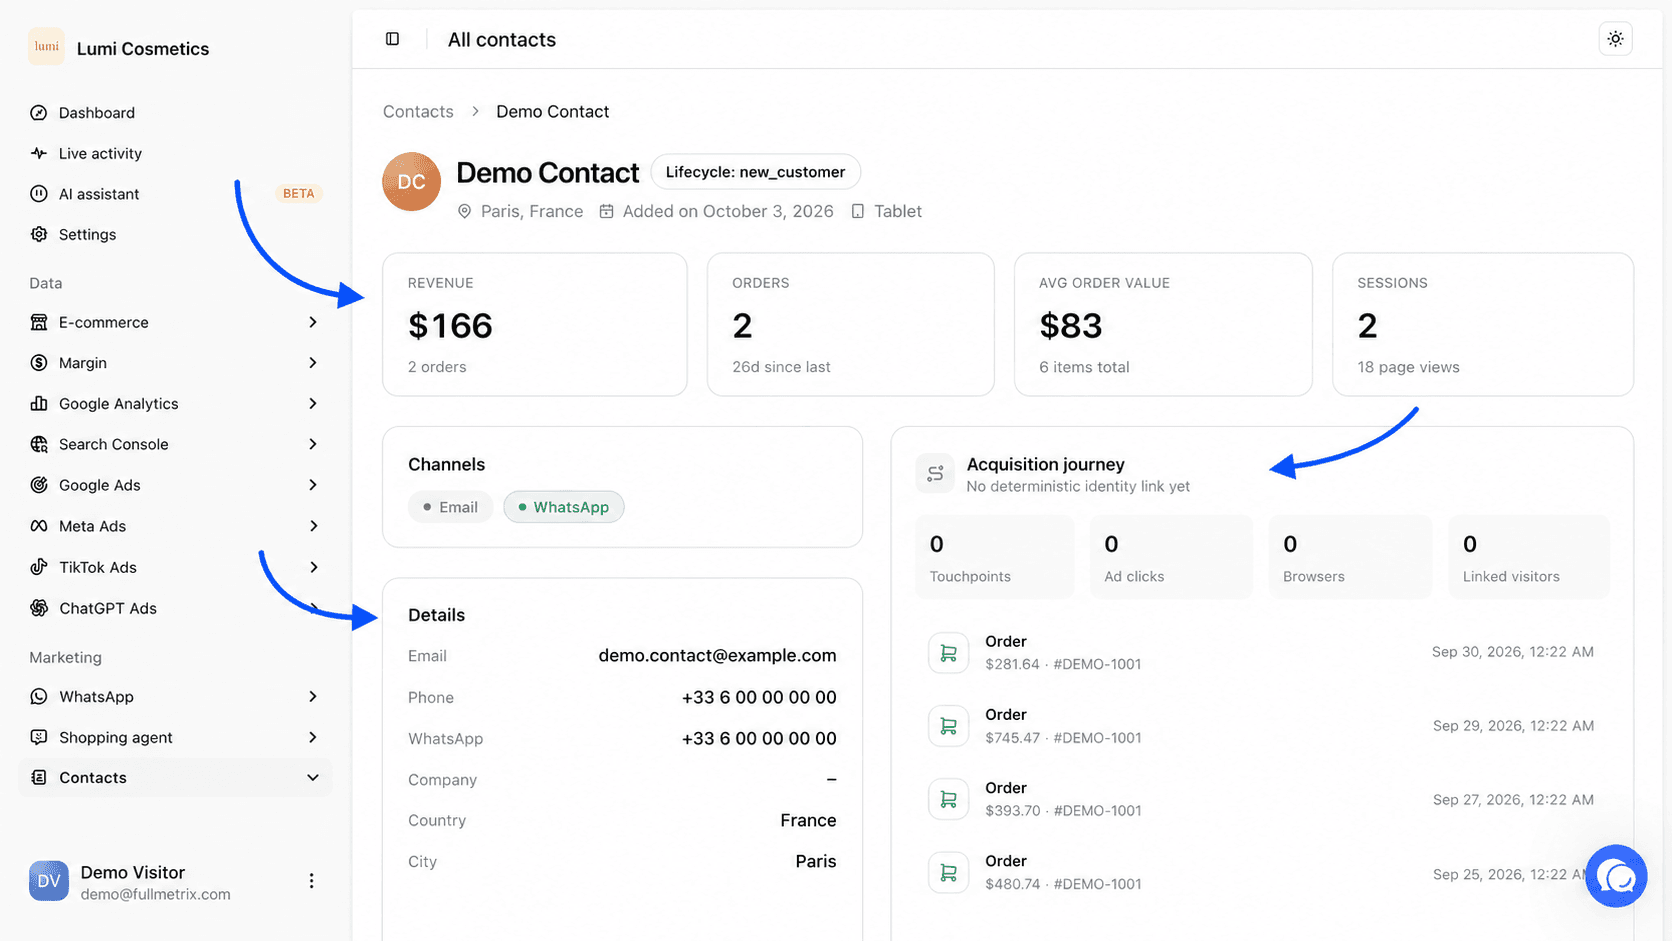
The header shows the person's name (or their email, or Anonymous) and a Lifecycle badge. This badge is computed from orders.
| Badge | Meaning |
|---|---|
| Lead | No order. |
| Customer | One order. |
| Repeat customer | Two orders or more. |
| VIP | Five orders or more, or at least 1,000 in revenue in the store currency. |
Below the name you see the city and country, the Added on date (the day the person was first identified) and the last device type used (Mobile, Tablet or Desktop).
The four key figures
- Revenue is the total spent, with the number of orders below.
- Orders is the number of orders, with the number of days since the last one.
- Avg order value is the average amount of an order, with the total number of items bought.
- Sessions is the number of tracked visits on your site, with the number of page views.
The orders counted are those kept by your report settings. Excluded statuses and ignored customers in Report settings are not counted.
Channels, details and order history
The Channels section shows two pills, Email and WhatsApp. A green pill means the person is subscribed to that marketing channel.
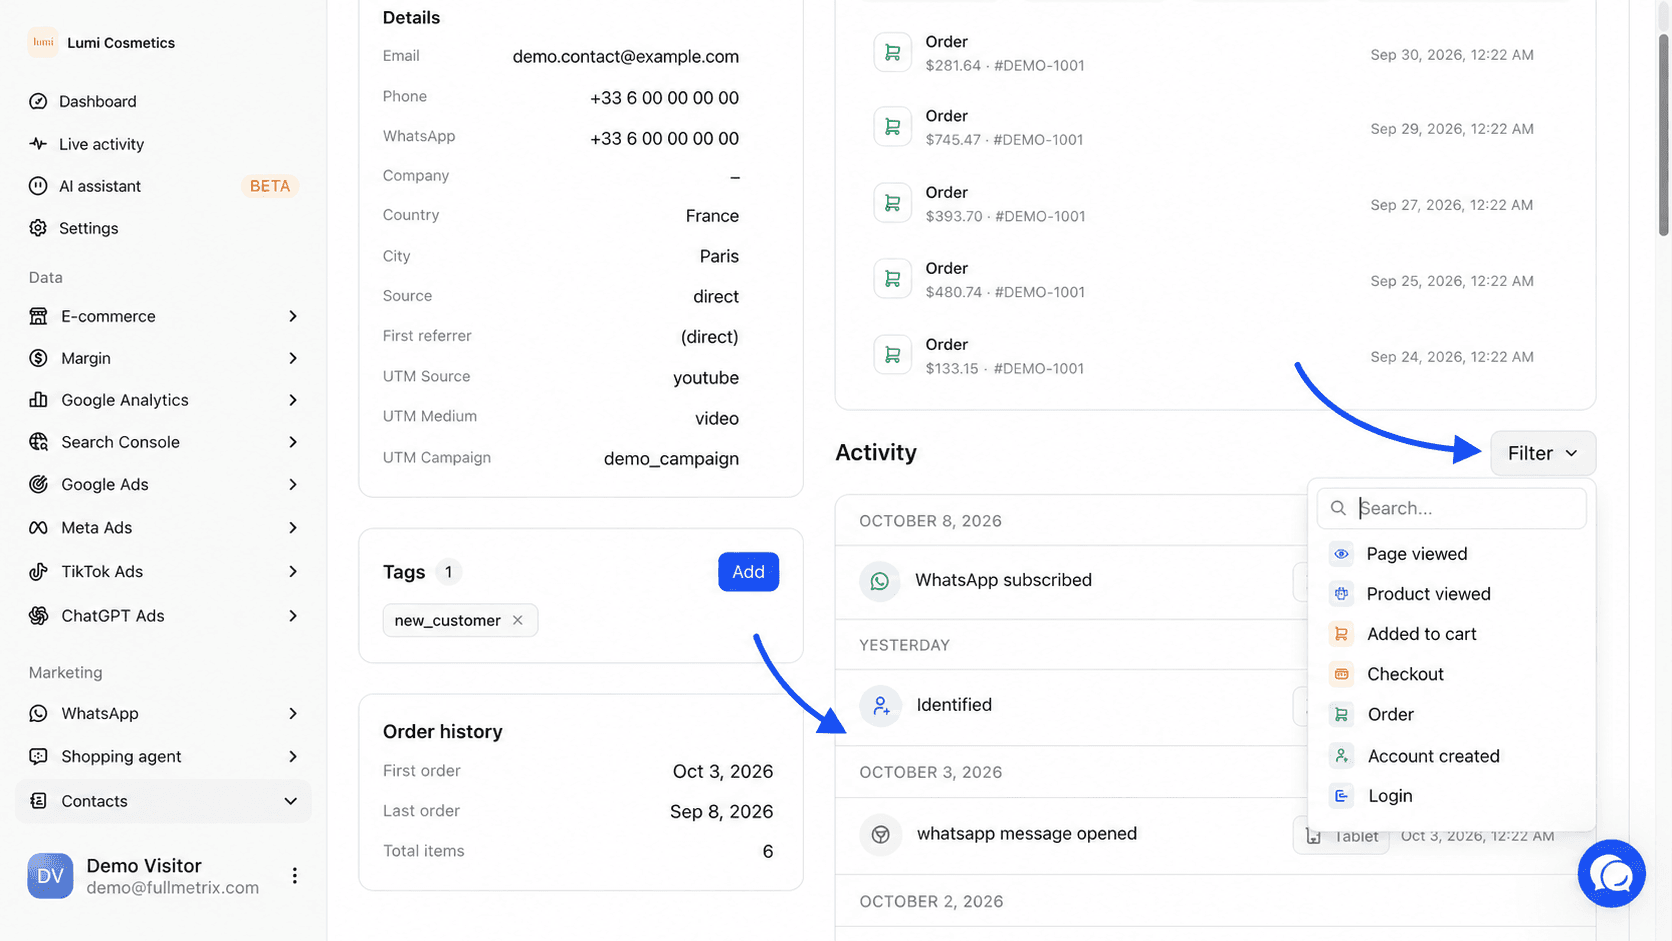
The Details section lists what we know about the person, Email, Phone, WhatsApp, Company, Country, City and Source (how they entered Fullmetrix, for example import or checkout). When site tracking recorded it, you also see the First referrer (the site the first visit came from) and the UTM Source, UTM Medium and UTM Campaign parameters of the arrival campaign.
If the person ordered, the Order history section shows the First order, the Last order and the Total items.
Add or remove a tag on the profile
The Tags section shows the person's labels and how many there are.
Open the add window
Click Add to the right of the Tags title. The Add a tag window opens.
Pick or create the tag
Type a few letters. Fullmetrix suggests tags already used in your organization, with the number of contacts carrying them. If the tag does not exist, click Create "your-tag". Tags are saved in lowercase.
Confirm
Click Add. The tag shows on the profile right away.
To remove a tag from this person, click the small cross next to its name. Clicking the tag name opens the Segments page with a new segment already filtered on that tag. To manage tags for the whole organization, use the Tags page.
The acquisition journey
The Acquisition journey block tells how the person reached their orders. At the top, a sentence says whether their identity is linked across devices and stores or whether there is no deterministic identity link yet. The First touch date follows.
Four counters sum up the journey, Touchpoints, Ad clicks, Browsers and Linked visitors. Below, each touchpoint is classified by channel (Paid search, Paid social, Organic search, Email, Referral, Direct...) with the campaign name and landing page when they are known. Orders slot into this timeline, and clicking one opens the Orders page on that order.
If the block fails to load, it shows Unable to load the acquisition journey. and a Retry button.
The activity feed
The Activity block lists the person's events, newest first, grouped by day (Today, Yesterday, then the date). You will find for example Page viewed, Product viewed, Added to cart, Checkout started, Order placed, Form submitted, Account created and WhatsApp subscribed.
- The Filter button limits the feed to certain event types, Page viewed, Product viewed, Added to cart, Checkout, Order, Account created and Login. A counter shows how many types are active. Reset removes the filter.
- Load more at the bottom of the feed shows older events.
- Clicking an event opens the Event details window, with the page involved and all the data received. The Copy button copies that data.
If the person has no tracked activity, the block shows No activity. Page views and viewed products only appear when site tracking is installed and active. See Site tracking.