Quickstart
Go from a connected store to a clear view of your performance in a few minutes.
Fullmetrix brings store and marketing data into one organization. Follow this sequence once so later reports use the correct store, currency, time zone, and date range.
Before you start
Prepare administrator access to the store, permission to install its connector, the organization’s reporting currency and time zone, and access to any marketing accounts you plan to connect.
1. Create the organization
Enter the company name, reporting currency, and time zone during onboarding. These settings control how money and dates are displayed, so use the store’s business settings rather than your computer’s local settings.
If the organization already exists, select it instead of creating a duplicate.
2. Connect the store
Choose the platform and follow its verified guide:
Use the intended Fullmetrix organization. A connection code belongs to one organization and platform and must be treated like a credential.
3. Wait for the historical import
The connector first imports historical orders, customers, products, and related commerce data. Keep the plugin or Shopify app installed, leave scheduled jobs running, and do not reconnect just because the import takes time.
Continue when Fullmetrix shows the store as connected and the initial synchronization no longer reports an active import.
Large stores take longer
Import duration depends on catalog size, order history, store performance, and API limits. Check the sync status before comparing totals with the store.
4. Validate the dashboard
Open Dashboard, select the intended store in All sources, and choose a short completed date range. Confirm that revenue and orders are plausible for the same period in the commerce platform.
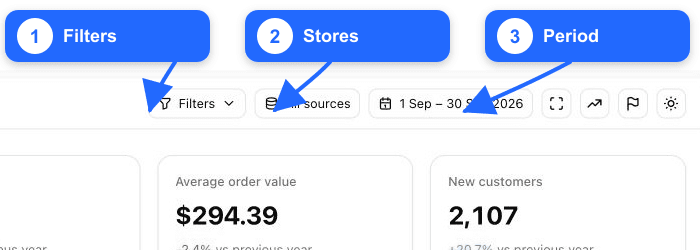
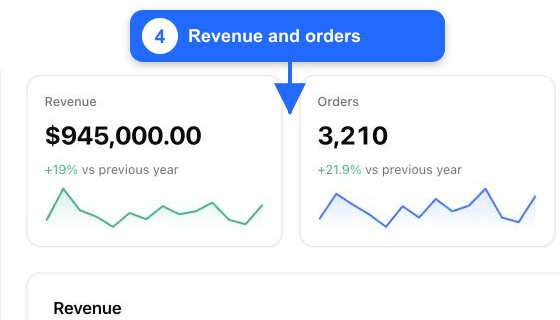
Small differences can come from time zone, excluded statuses, refunds, or the definition used by the platform. Do not change settings until you have recorded the exact period and comparison source.
5. Add your team and data sources
Invite only the people who need access and give them the least-privileged role that fits their work. Then connect the marketing sources you actually use from Settings > Integrations.
Advertising and analytics integrations add spend, campaign, audience, and acquisition context. They do not replace the e-commerce connection that supplies orders and products.
Completion checklist
- The correct organization, currency, and time zone are selected.
- The intended store is connected and the initial import has completed.
- Dashboard revenue and orders are plausible for a known completed period.
- Team access is limited to the people who need it.
- Optional marketing integrations are connected to the same business.
What's next
Continue with Understand the dashboard, then create your first report.